AWS Batch Extended AMIs
AWS Batch provides an excellent way to process hundreds or thousands of batch jobs very easily, but the default configurations provided may not be enough for most users. This post will help address the limitations of the default Amazon Machine Image (AMI) used in the managed compute environment.
First, here is a nice picture of some clouds to get you in the right mindset:

According to the main page of Amazon's AWS Batch:
AWS Batch enables developers, scientists, and engineers to easily and efficiently run hundreds of thousands of batch computing jobs on AWS. AWS Batch dynamically provisions the optimal quantity and type of compute resources (e.g., CPU or memory optimized instances) based on the volume and specific resource requirements of the batch jobs submitted. With AWS Batch, there is no need to install and manage batch computing software or server clusters that you use to run your jobs, allowing you to focus on analyzing results and solving problems. AWS Batch plans, schedules, and executes your batch computing workloads across the full range of AWS compute services and features, such as Amazon EC2 and Spot Instances.
For instance, say that you have a program that takes some input parameter n and gives you some result based on that number, but you want the ability to feed hundreds, perhaps thousands of different inputs into your program to compute the corresponding outputs. AWS Batch allows you to define this simple operation (for some n, compute the output) and will then take care of provisioning the necessary EC2 instances, cloud watch logs, error handling, and any other task necessary for you to run your workload.
The Problem
There are 4 primary steps that one must complete in order to run your first job on AWS Batch: 1. Define a compute environment. This includes selecting the IAM roles, your EC2 key pairs, the allowed EC2 instance types, networking configurations, autoscaling limits, etc. Essentially, you define the limits of your environment and what kind of hardware your VMs will be exposed to. 2. Define the job queue. Job queues act as the gatekeepers to your compute environments and decide which jobs to run and when based on the queues priority and hardware requirements. This is roughly analagous to a High Performance Computing (HPC) cluster's various queues that one might see, such as high priority queues that will give their tenants presidence over the jobs residing in lower priority queues. 3. Define the job definition. This step is optional, but it is useful if you have a job that you know you will run with different parameters in the future. This is arguably the most challenging step because you must create a Docker image for your program and decide how you want to interface with your program through the Docker ecosystem. The job definition is where you declare how many virtual CPUs (vCPU) you need, how much memory, the wallclock limit (called the "Execution Timeout"), IAM roles, environment variables, and various other configurations.. 4. Submit your job to a specific queue using your job definition.
Depending on the kind of program you are running, the amount of control that AWS Batch directly gives you over defining your compute environment might not be enough. I run an atmospheric science program called Basic Fusion (BF) that requires over 100GB of disk space, but when I tried to run it on AWS batch, I realized that the VMs that were automatically provisioned to me did not include a large enough disk volume. According to one of the official responses on the AWS developer forums, the default Amazon Machine Image (AMI) only provides 8GB of root storage and 22GB for Docker and metadata storage.
The recommended solution by Jamie is to use an unmanaged compute environment. Unfortunately this ended up being poor advice because not only is creating your own unmanaged compute environment difficult and esoteric, and not only does it kind-of defeat the entire purpose of AWS batch, but there is a much better (and much simpler) solution. Jamie had also promised in various other threads a blog post that would describe how to fix this problem, but she was never heard from again. So let me impart my knowledge to you!
The solution
The solution to this problem is to create an Amazon Machine Image that is dervied from the default AMI that AWS Batch uses. An AMI allows you to configure an operating system exactly how you want it by installing libraries, modifying startup scripts, customizing configuration files, and most importantly for our purposes: define the logical partitioning and mount points of data volumes. Let's get started.
Step 1: Choose a base AMI to start from, configure your instance
The AMIs we want to base ourselves off of are the official ECS-optimized AMIs. Take a gander at this page to find which AMI you need according to the AWS region you are running on. I am running in us-east-2, so I will choose that one.
After identifying your AMI, click the "Launch instance" link in the righthand column. You'll be taken to this page:

Choose the t2.micro instance type. NOTE that your AMI will not be married to the instance type you choose here, so don't agonize over this decision.
Choose Next: Configuration Details.
Give your instance an appropriate IAM role if desired. What constitutes "appropriate" is at your discretion. Leave the rest of the default options. Click Next: Add Storage.
Now is where you can configure what your data volumes will look like on your AMI. This step also does not define the final volume configuration for your AMI, but I find it to be useful to configure this how you want. You will have the opportunity to change this later before you create your AMI. Once you're done, click Next: Add Tags.
Add any tags that you want (optional). Click Next: Configure Security Group.
Select SSH for Type, and set the Source to be Anywhere, or if you are more responsible than me, set a specific set of IP ranges that you know you will be using to connect to your instance. Click Review and Launch.
This page will allow you to review the options you have set. If everything looks good, then Launch. When it asks for a keypair, either select and existing keypair you've created, or create a new one. Failing to do this step will leave you unable to connect to your instance.
Step 2: Configure your software environment
After you have clicked launch, go to your EC2 dashboard to see your running instances:
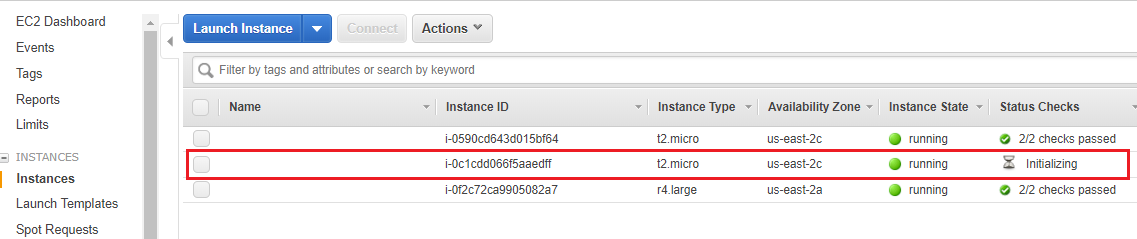
Wait for your instance to start, then right click it. Click Connect, then copy-paste the Example ssh command into an ssh-capable terminal. The -i "keyname.pem" is actually a path to your .pem file, so make sure you either cd to your ~/.ssh directory, or change the flag's value to be the path to where you stored your private SSH key. You also may need to change "root" to "ec2-user".

After you have logged in, you can configure your VM however you want by installing any packages, libraries, and configurations you need your VM to have. If you used the AWS-provided ECS-optimized AMI, your AMI will already meet the base requirements for an ECS AMI. If you for some (strange) reason choose not to use the ECS-optimized AMI, you will have install and configure the following packages:
- The latest version of the Amazon ECS container agent
- The latest version of the ecs-init agent
- The recommended version of Docker for your version of the ECS container agent
Also note that if you want to attach another volume separate from your root volume, you will want to modify the /etc/fstab file so that your new volume is mounted on instance startup. I refer you to Google on how to do this.
Step 3: Save your AMI
After all of your software configuration and installation is done, go back to your EC2 dashboard and view your running instances.
Right click on the instance you just made. Hover over Image, then select Create Image.
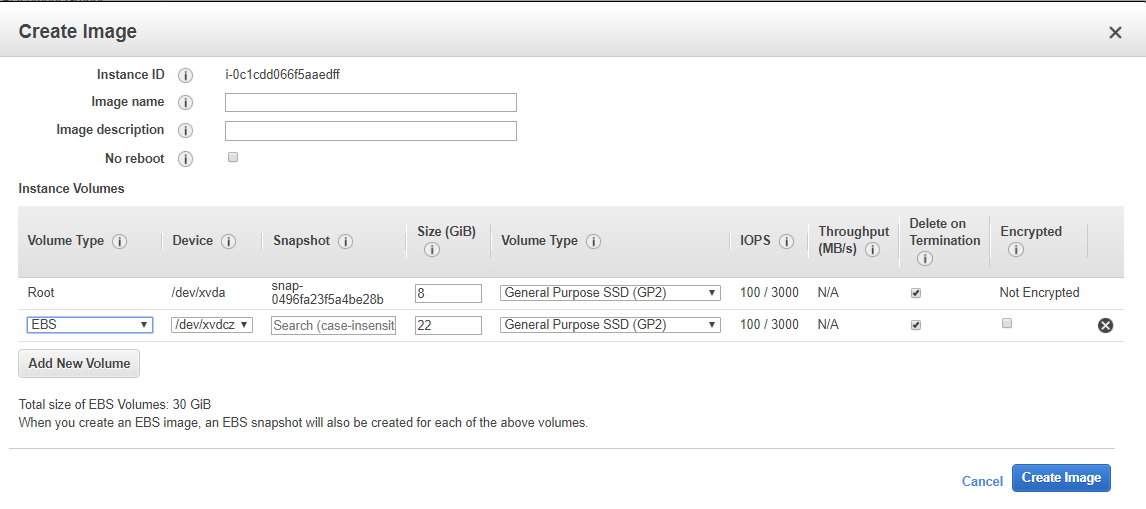
You'll see that this has the volume configuration you chose in Step 1. I did not change my volumes from their default settings, so you can see in the screenshot above that the default volumes for the ECS-optimized AMI are in fact 8GB for /dev/xvda/ (root), and 22GB for /dev/xvdc/ (docker images, etc). Ensure that the Delete on Termination options are selected so that your Batch compute environment removes the volumes after the instances are terminated, or else you'll risk creating an unbounded number of EBS volumes (very expensive, so I'm told). I will configure my AMI to have only 111GB of root storage, and nothing else. You do not necessarily need a separate volume for Docker.
Give your image a name and description, then select Create Image.
Your instance will be rebooted. Once the instance is turned off, AWS will create an image of it, then turn the instance back on.
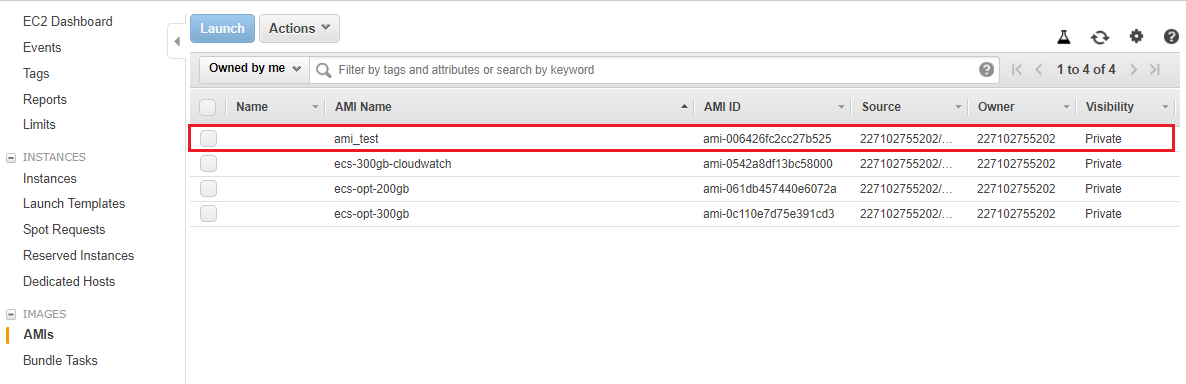
In your EC2 console, go to Images, AMIs on the left hand side. After a few minutes, you should see your newly created AMI in the list.
If you launch a new instance with this AMI, it should be automatically configured with the data volumes you specified.
Step 4: Configure AWS Batch to use your new AMI
Go back to your AWS dashboard and navigate to the AWS Batch page. Select Compute environments on the left hand side. Select Create environment.

Configure your environment by selecting the appropriate IAM roles for both your container (Service Role) and EC2 instance (Instance role), provisioning model, networking, and tags. Here are the options I've specified for this tutorial:
| Option | Value |
|---|---|
| Compute environment type | Managed |
| Compute environment name | ami_test |
| Service role | AWSBatchServiceRole |
| Instance role | ecsInstanceRole |
| EC2 key pair | landonkey.pem (use name of your private key) |
| Provisioning model | On-Demand (choose spot for significantly cheaper provisioning) |
| Allowed instance types | Optimal |
| Minimum vCPUs | 0 |
| Desired vCPUs | 0 |
| Maximum vCPUs | 256 |
| Enable user-specified Ami ID | True |
| AMI ID | [ID of AMI you generated] |
| VPC id | [default value] |
| Subnets | [select all options] |
| Security groups | default |
The critical step for this tutorial is selecting Enable user-specified Ami ID and specifying the AMI ID you generated in previous steps.
Once all of your options are configured, select Create.
Step 5: Create job queues and job definitions
In order to test that our compute environment actually works, let's go ahead and create some simple queues and job definitions.
Select Job queues on the left hand side and enter the following options:
| Option | Value |
|---|---|
| Queue name | ami_test_queue |
| Priority | 1 |
| Enable Job queue | True |
| Select a compute environment | ami_test |
Select Create. Wait for the Status on your new queue to be VALID.
Go to Job definitions and select Create. Enter the following values:
| Option | Value |
|---|---|
| Job definition name | ami_test_job_def |
| Job role | ECS_Administrator |
| Container image | amazonlinux |
| Command | df -h |
| vCPUs | 1 |
| Memory (MiB) | 1000 |
| Job attempts | 1 |
| Execution timeout | 100 |
| Parameters | [leave blank] |
| Environment variables | [leave blank] |
| Volumes | [leave blank] |
| Mount points | [leave blank] |
Select Create job definition.
Finally, go to Jobs on the left hand side and select Submit job. Give your job a name and select the ami_test_job_def:1 for the Job definition. Leave the rest of the default values and select Submit job.
If all goes well, you should now see that your job has entered either the Pending or Runnable states. Note that it may take upwards of 10 minutes before your job actually runs. The EC2 instance typically takes 5-10 minutes to be instantiated, and a few more minutes to pass status checks. If your job continues to be in the Runnable state after the instance has been created and has passed all status checks, something has gone wrong.
Luckily for me, it looks like my job ran successfully.

Looking at the CloudWatch output logs, we can see that the container has visibility to a ~111GB partition, and it is mounted on the container's root.

List of IAM roles used
I'll also list the IAM roles I used so that you can exactly replicate the policies that my resources are given.
Disclaimer: I explicitly do not condone giving any of your resources full administrative power! I only gave a few of my resources administrative power purely because I do not fully understand which policies are needed in certain circumstances, so I am naively doing the "Nuclear Bomb" approach of just granting them everything. I fully recognize that this is bad practice, so do as I say, not as I do! I would appreciate help in determining exactly which policies I need, so submit a GitHub issue if you know.
| Role name | Attached policies |
|---|---|
| AWSBatchServiceRole | AWSBatchServiceRole |
| ecsInstanceRole | CloudWatchAgentServerPolicy : CloudWatchFullAccess : CloudWatchLogsFullAccess : AmazonEC2ContainerServiceFullAccess : AmazonEC2ContainerSErviceforEC2Role : CloudWatchEventsFullAccess |
| ECS_Administrator | AdministratorAccess |
Troubleshooting
The most common issue you will run into is your jobs getting stuck in the Runnable state. Some things you can try to fix this:
- For each of the IAM roles you assign, go through each role, one at a time, and attach the AdministratorAccess policy to them. This includes the IAM roles on your compute environment and your job definitions. Then, restart your compute environments, job queues, and jobs to see if they will run. If your job successfully runs after changing one of the roles, you know that you must have insufficient permissions on that role.
- Create a separate compute environment that does not have a user-specified AMI. I have found in some cases that reverting back to the Batch-managed ECS-optimized AMI allowed my jobs to run, indicating that there must have been something wrong with the AMI I created. I strongly recommend everyone base their AMI off of the ECS-optimized AMIs, because these have all of the daemons necessary to be integrated in an ECS cluster, as well as daemons that send metrics and logs to CloudWatch.
- If you used a security policy that only allows incoming IPs from a specific range, try allowing all IP ranges in your policy. One clue that may tip you off is if you are unable to manually connect through SHH to any of the instances created by Batch.
- Re-check that your job definition is not requesting more resources than what your compute environment can provide. Setting the allowed instances to Optimal will usually allow most jobs to be run, but if you selected only specific allowed instances, your job may simply be too big.
Limitations and alternatives
The method described in this blog only allows you to create statically-sized data volumes for your instances. This means that even if you intend for each container process to have access to 100GB of storage, it is possible that your processes will end up competing with other processes for the same 100GB. This is because AWS Batch often places multiple container processes on the same EC2 instance if there is enough space. If you chose Optimal for your allowed instance type, this means that Batch could possibly choose some EC2 type capable of hosting dozens of container instances, thus splitting up your storage amongst all of them.
The way that I get around this is by manually specifying which instances I allow so that I know exactly how Batch will partition the instance, as well as how many vCPUs and how much memory my jobs can request. If you choose the r5.large instance, you know for a fact that no more than two single-process container jobs will ever run on it.
One of the alternatives suggested on the AWS developer forums is to use AWS Lambda to dynamically create and mount data volumes on the instances created by Batch. This gives you more flexibility to create appropriately-sized volumes for a dynamically chosen instance type (in the case of the Optimal option). However, you have to decide for yourself if this extra effort is worth it, keeping in mind that Occam's razor: "the simpler solution is usually the better one."
Suggestions
If you find anything wrong with this blog post (and I can guarantee you that something is wrong), please post an issue on my github.io repository. Click the GitHub icon at the bottom of this page to visit the repo.